
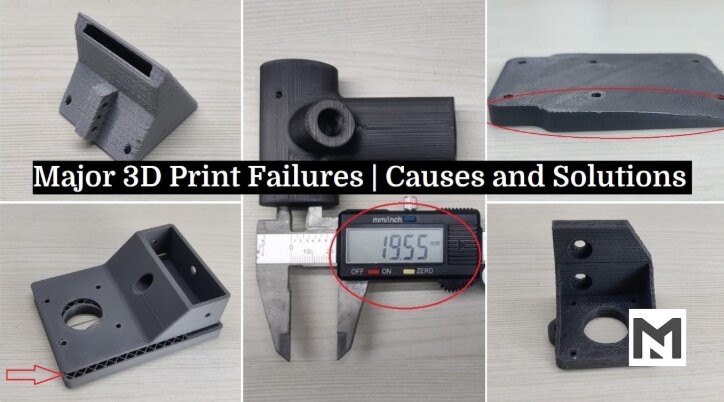
3D printing can produce incredibly detailed and functional parts, but even experienced makers encounter failed prints from time to time. Understanding the different 3D print failure types is one of the fastest ways to improve print quality, reduce wasted filament, and spend less time troubleshooting.
Most print failures leave behind recognizable symptoms. A warped corner, missing layers, blobs, stringing, or poor bed adhesion each point toward specific causes. Once you learn to identify these signs, diagnosing problems becomes much easier.
This guide covers the most common 3D print failure types, what causes them, how to fix them, and how to prevent them from happening again.
Why Understanding 3D Print Failure Types Matters
Every failed print costs time, material, and sometimes even printer components.
Learning to recognize failure patterns helps you:
- Diagnose issues quickly
- Reduce filament waste
- Improve overall print quality
- Increase successful first prints
- Extend printer lifespan
- Save time on trial and error
Instead of randomly changing settings, you’ll know exactly which adjustments solve each problem.
Quick Reference Table
| Failure Type | Most Common Cause | Difficulty to Fix |
|---|---|---|
| Poor Bed Adhesion | Dirty bed, incorrect Z offset | Easy |
| Warping | Cooling too quickly | Easy |
| Stringing | High nozzle temperature | Easy |
| Layer Shifting | Loose belts or skipped steps | Medium |
| Under Extrusion | Partial nozzle clog | Medium |
| Over Extrusion | Incorrect flow settings | Easy |
| Elephant’s Foot | Bed too hot | Easy |
| Ringing | High print speed | Medium |
| Z Banding | Mechanical issues | Medium |
| Pillowing | Too few top layers | Easy |
| Blobs and Zits | Pressure inconsistencies | Medium |
| Delamination | Low nozzle temperature | Medium |
| Spaghetti Print | Print detached from bed | Easy |
| Heat Creep | Cooling problems | Hard |
1. Poor Bed Adhesion
Poor bed adhesion is one of the most common failures, especially for beginners.
Symptoms
- First layer won’t stick
- Corners lift immediately
- Print slides around
- Entire print detaches
Common Causes
- Dirty build plate
- Incorrect nozzle height
- Low bed temperature
- Incorrect first-layer speed
- Worn build surface
How to Fix It
- Clean the bed with isopropyl alcohol
- Re-level the bed
- Adjust the Z offset
- Slow the first layer
- Increase bed temperature slightly
Prevention
- Clean the bed regularly
- Avoid touching the print surface
- Check leveling before long prints
2. Warping
Warping occurs when the edges of the print lift away from the build plate.
Symptoms
- Corners curl upward
- Bottom no longer flat
- Print separates from the bed
Causes
- Cooling too quickly
- Cold room
- Drafts
- Large flat models
- Incorrect bed temperature
Solutions
- Increase bed temperature
- Add a brim
- Use an enclosure
- Reduce cooling fan speed for the first layers
- Avoid drafts
3. Stringing
Stringing creates thin strands of filament between separate parts of the model.
Symptoms
- Spiderweb-like strings
- Thin plastic hairs
- Rough surface finish
Causes
- High nozzle temperature
- Poor retraction settings
- Wet filament
- Slow travel moves
Fixes
- Lower nozzle temperature
- Increase retraction distance
- Increase travel speed
- Dry filament
4. Layer Shifting
Layer shifting causes the print to suddenly move in one direction.
Symptoms
- Offset layers
- Crooked print
- Sudden step in the model
Causes
- Loose belts
- Obstructions
- Stepper motor skipping
- High print speed
- Loose pulleys
Fixes
- Tighten belts
- Reduce print speed
- Check pulleys
- Remove obstructions
- Inspect motor drivers
5. Under Extrusion
Under extrusion occurs when insufficient filament exits the nozzle.
Symptoms
- Gaps in walls
- Thin layers
- Weak prints
- Missing sections
Causes
- Partial nozzle clog
- Incorrect flow rate
- Low temperature
- Worn extruder gear
- Filament slipping
Solutions
- Clean the nozzle
- Increase temperature
- Calibrate extrusion
- Replace worn components
6. Over Extrusion
Over extrusion happens when too much filament is deposited.
Symptoms
- Bulging walls
- Surface blobs
- Poor dimensional accuracy
- Thick layers
Causes
- Flow rate too high
- Incorrect filament diameter settings
- Extruder calibration errors
Fixes
- Calibrate E-steps
- Lower flow percentage
- Verify filament diameter
7. Elephant’s Foot
The first few layers become wider than intended.
Symptoms
- Bottom edge bulges outward
- Poor fit with mating parts
Causes
- High bed temperature
- Nozzle too close
- Excessive first-layer squish
Fixes
- Lower bed temperature
- Raise Z offset slightly
- Enable elephant foot compensation
8. Ringing (Ghosting)
Ringing appears as repeated ripples near sharp corners.
Symptoms
- Wavy surface
- Echoes after corners
- Visible vibration marks
Causes
- High acceleration
- Loose frame
- High print speed
- Belt tension issues
Fixes
- Reduce acceleration
- Tighten frame
- Lower speed
- Tune input shaping if available
9. Z Banding
Horizontal lines appear consistently throughout the print.
Symptoms
- Repeating horizontal ridges
- Uneven walls
Causes
- Bent lead screw
- Dirty lead screw
- Mechanical binding
- Misaligned Z axis
Solutions
- Clean lead screws
- Lubricate threaded rods
- Check alignment
- Replace damaged parts
10. Pillowing
The top surface develops holes or soft spots.
Symptoms
- Small openings
- Puffy top layer
- Uneven top surface
Causes
- Too few top layers
- Low infill
- Excessive cooling
Fixes
- Increase top layers
- Increase infill
- Reduce cooling slightly
11. Blobs and Zits
Random bumps appear across the print.
Symptoms
- Small bumps
- Uneven surface
- Extra plastic deposits
Causes
- Excess pressure
- Moist filament
- Slow travel
- Inconsistent extrusion
Solutions
- Dry filament
- Optimize retraction
- Enable coasting or pressure advance
- Increase travel speed
12. Delamination (Layer Separation)
Layers fail to bond together.
Symptoms
- Cracks between layers
- Parts split apart
- Weak prints
Causes
- Low nozzle temperature
- Cooling too aggressively
- Wet filament
- Printing too fast
Fixes
- Increase nozzle temperature
- Reduce cooling
- Slow print speed
- Dry filament
13. Spaghetti Print
The printer continues printing after the model has detached.
Symptoms
- Tangled filament
- Massive string mess
- Print completely fails
Causes
- Poor adhesion
- Support failure
- Mechanical collision
- Model tipping over
Solutions
- Improve bed adhesion
- Strengthen supports
- Monitor first layers
- Enable AI print failure detection if available
14. Heat Creep
Heat travels too far into the hotend, softening filament before it reaches the nozzle.
Symptoms
- Frequent jams
- Extruder clicking
- Inconsistent extrusion
Causes
- Poor hotend cooling
- High ambient temperature
- Fan failure
Fixes
- Inspect cooling fan
- Improve airflow
- Lower chamber temperature for PLA
Less Common 3D Print Failure Types
Although less frequent, these issues still occur:
- Nozzle clogging
- Thermal runaway errors
- Support collapse
- Layer splitting
- Filament grinding
- Filament snapping
- Bridging failure
- Corner lifting
- Surface scars
- Seam imperfections
- Dimensional inaccuracies
- Infill separation
How to Diagnose Print Failures Faster
Rather than changing multiple settings at once, use a systematic approach.
Step 1: Observe the Failure
Ask:
- Did it happen on the first layer?
- Mid-print?
- Near the top?
- Throughout the print?
The timing often narrows down the likely cause.
Step 2: Check the Machine
Inspect:
- Belts
- Wheels
- Bed leveling
- Nozzle
- Extruder gears
- Cooling fans
Mechanical issues are often overlooked.
Step 3: Review Print Settings
Compare:
- Nozzle temperature
- Bed temperature
- Print speed
- Retraction
- Cooling
- Layer height
- Flow rate
Only change one setting at a time to determine its effect.
Preventing Most Print Failures
Many problems can be avoided with regular maintenance and proper printing habits.
Keep the Printer Clean
Dust, filament debris, and residue can affect movement and adhesion.
Store Filament Properly
Use airtight containers with desiccants to keep filament dry.
Perform Routine Maintenance
Check:
- Belt tension
- Screws
- Bearings
- Wheels
- Fans
- Nozzles
Calibrate Regularly
Periodically verify:
- Bed leveling
- Extruder steps
- Flow rate
- Temperature accuracy
Use Quality Filament
Low-quality filament often has inconsistent diameter, poor winding, and contaminants that increase the likelihood of print failures.
Frequently Asked Questions
What is the most common 3D print failure?
Poor bed adhesion is generally the most common issue. If the first layer fails, the rest of the print is unlikely to succeed.
Why do my prints fail halfway through?
Mid-print failures are often caused by layer shifting, nozzle clogs, filament tangles, heat creep, or the model detaching from the build plate.
Does wet filament cause print failures?
Yes. Moisture absorbed by filament can lead to stringing, popping sounds, poor layer adhesion, rough surfaces, and inconsistent extrusion.
Can slicer settings alone fix print failures?
Sometimes, but not always. Mechanical problems, worn components, dirty nozzles, and poor-quality filament can all produce symptoms similar to incorrect slicer settings.
How can I reduce failed prints?
Start with a clean, level build plate, use dry filament, calibrate your printer regularly, and make changes one setting at a time when troubleshooting.
Final Thoughts
Every 3D printing enthusiast experiences failed prints, regardless of skill level. The key difference between beginners and experienced makers is not avoiding failures altogether, but recognizing them quickly and knowing how to respond.
Most 3D print failure types have clear visual signs that point to a small set of likely causes. By learning these patterns, maintaining your printer, and using consistent printing practices, you’ll spend less time troubleshooting and more time producing reliable, high-quality prints.
Treat each failed print as useful feedback rather than a setback. With a methodical approach, even frustrating failures become valuable opportunities to improve your printer, your settings, and your overall 3D printing skills.